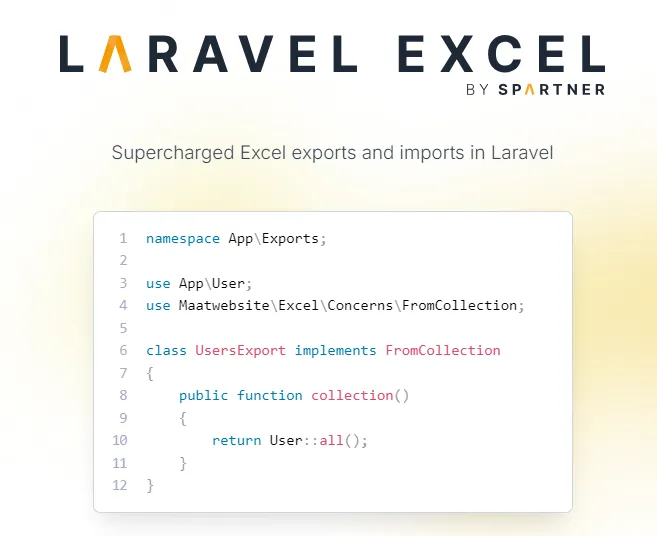
ระบบต่าง ๆ ส่วนใหญ่จะมีฟังก์ชันการนำเข้า (importing), การส่งออก (export) ข้อมูลในระบบ เป็นรูปแบบต่าง เช่น csv, text, excel, pdf เป็นต้น ซึ่งแต่ละภาษาโปรแกรมก็จะมี librarys เป็นของตัวเอง laravel ก็เช่นกัน ก็เลยจะมาพูดถึงการใช้งาน laravel ร่วมกับ larave-excel.com มาลองเรียนรู้การใช้งาน และมาบอกถึงปัญหา และวิธีการแก้ไขด้วยคุณสมบัติของ larave-excel.com กัน

Laravel-Excel คืออะไร
Laravel Excel มีวัตถุประสงค์เพื่อเป็น PhpSpreadsheet ที่ปรุงแต่งโดย Laravel: wrapper ที่เรียบง่าย แต่สวยงาม PhpSpreadsheet โดยมีเป้าหมายเพื่อทำให้การส่งออก (export) และนำเข้า (import) ง่ายขึ้น
🔥 PhpSpreadsheet เป็นไลบรารีที่เขียนด้วย PHP ล้วนๆ และมีชุดคลาสที่ให้คุณอ่านและเขียนไปยังรูปแบบไฟล์สเปรดชีตต่างๆ เช่น Excel และ LibreOffice Calc
คุณสมบัติ Laravel Excel
- ส่งออกคอลเลกชันไปยัง Excel ได้อย่างง่ายดาย
- ส่งออกคำค้นหาด้วยการแบ่งส่วนอัตโนมัติเพื่อประสิทธิภาพที่ดีขึ้น
- คิวการส่งออกเพื่อประสิทธิภาพที่ดีขึ้น
- ส่งออกมุมมอง Blade ไปยัง Excel ได้อย่างง่ายดาย
- นำเข้าไปยังคอลเลกชันได้อย่างง่ายดาย
- อ่านไฟล์ Excel เป็นกลุ่มๆ
- จัดการส่วนแทรกนำเข้าเป็นชุด
การติดตั้ง
ก่อนที่จะเริ่มทำการติดตั้ง มาตรวจสอบ php extensions ก่อน ว่ามีความพร้อมตามนี้หรื
- PHP:
^7.2\|^8.0 - Laravel:
^5.8 - PhpSpreadsheet:
^1.21 - PHP extension
php_zipenabled - PHP extension
php_xmlenabled - PHP extension
php_gd2enabled - PHP extension
php_iconvenabled - PHP extension
php_simplexmlenabled - PHP extension
php_xmlreaderenabled - PHP extension
php_zlibenabled
เมื่อทุกอย่างพร้อม ก็มาเริ่มติดตั้งกันเลย
ทำการเริ่ม dependency package เข้า ด้วย composer
// ติดตั้งแบบกำหนดเวอร์ชั่น
composer require maatwebsite/excel:^3.1

// ติดตั้งแบบเวอร์ชั่น ล่าสุด
composer require maatwebsite/excel
ทำการเพิ่ม new provider ใน config/
'providers' => [
    /*
     * Package Service Providers...
     */
    Maatwebsite\Excel\ExcelServiceProvider::class,
]

'aliases' => [
    ...
    'Excel' => Maatwebsite\Excel\Facades\Excel::class,
]

php artisan vendor:publish --provider="Maatwebsite\Excel\ExcelServiceProvider" --tag=config
เริ่มการส่งออก (export)
ใช้คำสั่งเพื่อสร้างคลาส export
php artisan make:export UsersExport --model=User.
├── app
│ ├── Exports
│ │ ├── UsersExport.php
│
└── composer.json<?php
namespace App\Exports;
use App\Models\User;
use Maatwebsite\Excel\Concerns\FromCollection;
class UsersExport implements FromCollection
{
public function collection()
{
return User::all();
}
}สร้าง controller กรณีต้องการเพื่อทำดาวน์โหลด
<?php

namespace App\Http\Controllers;

use App\Exports\UsersExport;
use Maatwebsite\Excel\Facades\Excel;

class UsersController extends Controller
{
    public function export()
    {
        return Excel::download(new UsersExport, 'users.xlsx');
    }
}

Route::get('users/export/', [UsersController::class, 'export']);
คุณสมบัติเพิ่มเติมของการส่งออก (export)
- export เก็บที่ storage เครื่อง
- export รูปแบบต่าง ๆ excel, csv, html, pdf เป็นต้น
- export แบบใส่เงื่อนไข query ข้อมูล
- export ด้วย blade template
- export ด้วย collection data
- export หลาย sheeet ในไฟล์เดียว
- export กำหนดชนิดข้อมูลแต่ละคอลัมน์
- อื่น ๆ
เริ่มการนำเข้า (importing)
ใช้คำสั่งเพื่อสร้างคลาส import
php artisan make:import UsersImport --model=User.
├── app
│ ├── Imports
│ │ ├── UsersImport.php
│
└── composer.json<?php
namespace App\Imports;
use App\Models\User;
use Illuminate\Support\Facades\Hash;
use Maatwebsite\Excel\Concerns\ToModel;
class UsersImport implements ToModel
{
/**
* @param array $row
*
* @return User|null
*/
public function model(array $row)
{
return new User([
'name' => $row[0],
'email' => $row[1],
'password' => Hash::make($row[2]),
]);
}
}สร้าง controller เพื่อนำเข้าข้อมูล
use App\Imports\UsersImport;
use Maatwebsite\Excel\Facades\Excel;
use App\Http\Controllers\Controller;

class UsersController extends Controller
{
    public function import()
    {
        Excel::import(new UsersImport, 'users.xlsx');

        return redirect('/')->with('success', 'All good!');
    }
}
คุณสมบัติเพิ่มเติมของการนำเข้า (importing)
- import ไฟล์จาก local storage, s3
- import จาก ฟอร์ม อัพโหลด
- import เก็บใส่ collection
- import ใส่ models
- import ด้วยชนิดไฟล์ เช่น excel, csv, text เป็นต้น
- import แบบมีหลาย sheets
- import แบบเลือก headers
- import แบบ batches
- import แบบแบ่งขนาดทำงาน
- import ตรวจสอบเงื่อนไขต่าง ๆ
- import mapped คอลัมน์
- import csv กำหนด encoding
- อื่น ๆ
ตัวอย่างโค๊ดของผม
- การนำเข้า (importing)
<?php

namespace App\Exports;

use App\Models\ShippingOrder;
use Illuminate\Support\Facades\DB;
use Maatwebsite\Excel\Concerns\FromQuery;
use Maatwebsite\Excel\Concerns\WithHeadings;
use Maatwebsite\Excel\Concerns\Exportable;
use Maatwebsite\Excel\Concerns\WithColumnWidths;
use CommonHelper;

class ExportOrder implements FromQuery, WithHeadings, WithColumnWidths
{
    use Exportable;

    public function __construct($createdDateStart, $createdDateEnd, $orderStatus, $createdBy, $profile, $headings)
    {
        $this->createdDateStart = $createdDateStart;
        $this->createdDateEnd = $createdDateEnd;
        $this->orderStatus = $orderStatus;
        $this->createdBy = $createdBy;
        $this->profile = $profile;
        $this->headings = $headings;
    }

    public function query()
    {
        $query = ShippingOrder::query()
                        ->addSelect(DB::raw("DATE_FORMAT(shipping_order.created_at,'%d/%m/%Y %H:%i:%s') as created_at_human"))
                        ->addSelect('shipping_order.order_code as order_code')
                        ->addSelect(DB::raw("
                                CASE
                                    WHEN order_status = 'success' THEN 'สำเร็จ'
                                    WHEN order_status = 'cancel' THEN 'ยกเลิก'
                                    WHEN order_status = 'draft' THEN 'ฉบับร่าง'
                                    ELSE 'อื่นๆ'
                                END  as order_status
                            "))
                        ->addSelect(DB::raw("(SELECT
                                    COUNT(*)
                                    FROM shipping_order_item i
                                    WHERE i.order_id = shipping_order.order_id) as items_count"))
                        ->addSelect(DB::raw("(SELECT
                                    SUM(IFNULL(i.sale_price_rate,0))
                                    FROM shipping_order_item i
                                    WHERE i.order_id = shipping_order.order_id) as price_rates_sum"))
                        ->addSelect(DB::raw("(SELECT
                                    SUM(IFNULL(i.special_area_fee,0))
                                    FROM shipping_order_item i
                                    WHERE i.order_id = shipping_order.order_id) as special_area_fees_sum"))
                        ->addSelect(DB::raw("(SELECT
                                    SUM(IFNULL(i.sale_price_rate,0)) +
                                    SUM(IFNULL(i.special_area_fee,0))
                                    FROM shipping_order_item i
                                    WHERE i.order_id = shipping_order.order_id) as price_rate_fee_total"))
                        ->addSelect('shipping_order.sender_name as sender_name')
                        ->addSelect('shipping_order.created_by as created_by');
        if(!is_null($this->createdDateStart) && !is_null($this->createdDateEnd)) {
            $from = $this->createdDateStart;
            $to = $this->createdDateEnd;
            $query->whereBetween('created_at', [$from, $to]);
        }
        if(!is_null($this->orderStatus)) {
            $query->where('order_status', $this->orderStatus);
        }
        if(!is_null($this->createdBy)) {
            $query->where('created_by', $this->createdBy);
        }

        if($this->profile->shop != null) {
            $query->where('shop_id',$this->profile->shop->shop_id);
        }

        return $query;
    }

    public function headings(): array
    {
        return $this->headings;
    }

    public function columnWidths(): array
    {
        return [
            'A' => 25,
            'B' => 25,
            'C' => 10,
            'D' => 15,
            'E' => 15,
            'F' => 15,
            'G' => 15,
            'H' => 20,
            'I' => 20,
        ];
    }
}
- การส่งออก (export)
<?php

namespace App\Imports;

use App\Models\ShippingImportItem;
use App\Models\ShippingImport;
// use Maatwebsite\Excel\Concerns\ToModel;
use Illuminate\Support\Collection;
use Maatwebsite\Excel\Concerns\ToCollection;
use Maatwebsite\Excel\Concerns\WithStartRow;
use Maatwebsite\Excel\Concerns\Importable;
use Maatwebsite\Excel\Concerns\SkipsEmptyRows;
use Maatwebsite\Excel\Concerns\WithCalculatedFormulas;
// use Maatwebsite\Excel\Concerns\WithValidation;
use Illuminate\Support\Facades\Validator;

class ImportOrderItem implements ToCollection, WithStartRow, SkipsEmptyRows, WithCalculatedFormulas
{
    use Importable;

    public function __construct($importId, $createdBy)
    {
        $this->importId = $importId;
        $this->createdBy = $createdBy;
    }

    /**
     * @return int
     */
    public function startRow(): int
    {
        return 2;
    }

    /**
    * @param array $row
    *
    * @return \Illuminate\Database\Eloquent\Model|null
    */
    public function collection(Collection $rows)
    {

        Validator::make($rows->toArray(), [
            '*.0' => 'required',  // A
            '*.1' => 'required',  // B
            '*.2' => 'required',  // C
            '*.3' => 'required',  // D
            '*.4' => 'required',  // E
            // '*.5' => 'required',  // F
            // '*.6' => 'required',  // G
            '*.7' => 'required',  // H
            // '*.8' => 'required',  // I
            '*.9' => 'required',  // J
            '*.10' => 'required',  // K
            // '*.11' => 'required',  // L
            '*.12' => 'required',  // M
            // '*.13' => 'required',  // N
        ])->validate();

        // dd($rows);
        foreach ($rows as $idx => $row) {

            $senderName = $row[1];
            $senderMobile = $row[2];

            if($idx == 0) {
                $import = ShippingImport::find($this->importId);
                $import->sender_name = $senderName;
                $import->sender_mobile = $senderMobile;
                $import->save();
            }

            ShippingImportItem::create([
                'import_id' => $this->importId,
                'delivery_number' => $row[0],
                'sender_name' => $senderName,
                'sender_mobile'  => $senderMobile,
                'recipient_name'  => $row[3],
                'recipient_mobile' => $row[4],
                'recipient_province' => $row[5],
                'recipient_district' => $row[6],
                'recipient_sub_district' => $row[7],
                'recipient_address' => $row[8],
                'recipient_zipcode' => $row[9],
                'volumetric_weight' => $row[10],
                'actual_weight' => $row[11],
                'parcel_weight' => $row[12],
                // 'shipping_cost_received' => $row[13], // cancel on v2.0
                'remote_area_fee' => $row[13],
                'import_status'=> "active",
                'created_by'=> $this->createdBy,
            ]);
        }
    }
}
ปัญหาต่าง ๆ ที่พบระหว่างที่ใช้งาน
- อ่าน คอลัมน์ที่มีสูตร (Formula cell) แก้ไขด้วย `use Maatwebsite\Excel\Concerns\WithCalculatedFormulas;`
- ข้ามแถวข้อมูลที่ว่าง แก้ไขด้วย `use Maatwebsite\Excel\Concerns\SkipsEmptyRows;`
- กำหนดแถวเริ่มอ่านข้อมูล แก้ไขด้วย `use Maatwebsite\Excel\Concerns\WithStartRow;`
- กำหนดชื่อหัวตารางแต่ละ คอลัมน์ แก้ไขด้วย `use Maatwebsite\Excel\Concerns\WithHeadings;`
- กำหนดขนาดความกว้างของแต่ละคอลัมน์ แก้ไขด้วย `use Maatwebsite\Excel\Concerns\WithColumnWidths;`
สรุปท้ายบทความ
จากที่ได้ทดลองใช้งาน ปัญหาต่าง ๆ ที่พบในระหว่างการใช้งาน ส่วนใหญ่จะหาวิธีการแก้ไขได้ เพราะ laravel-excel เองจะมีวิธีการแก้ไขไว้หมดแล้ว ยังสามารถกำหนด รูปแบบ (sheet style) ได้อีกด้วย ศึกษาเพิ่มเติม สำหรับเพื่อนคนไหน ได้ลองใช้งาน และพบปัญหาการใช้งาน หรือเจอวิธีการใช้งานดี ๆ เม้นมาบอกกันได้เลย ขอบคุณที่ติดตามครับ